Drywall Repair Tips, Butterfly patch, Fredericton, NB
As a homeowner in Fredericton, NB, you want to keep your home in tip top condition. If you have a small hole in a wall that is proving to be difficult to patch over using common methods of drywall repair, the butterfly patch is a terrific DIY solution. Perhaps the hole is too small to get any backer boards in, or you want to minimize the time for the drywall sanding. The butterfly patch is a wonderfully simple, fast, and effective way to patch up a wall before painting. It utilizes the paper backing of gypsum board as both a structural, and aesthetic blending tool in this process. When you are done with this patch, you will hardly notice it is there.
The first thing you are going to want to do in this process is to cut out your hole so it is rectangular in shape. This makes it easier down the road to do the patch, as you will see in a second. It also makes your interior painting job much easier since you can blend the edges of the repair almost seamlessly into the surrounding wall.
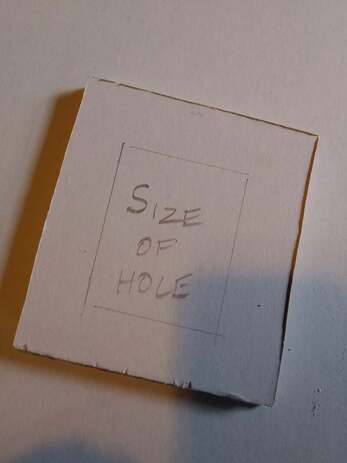
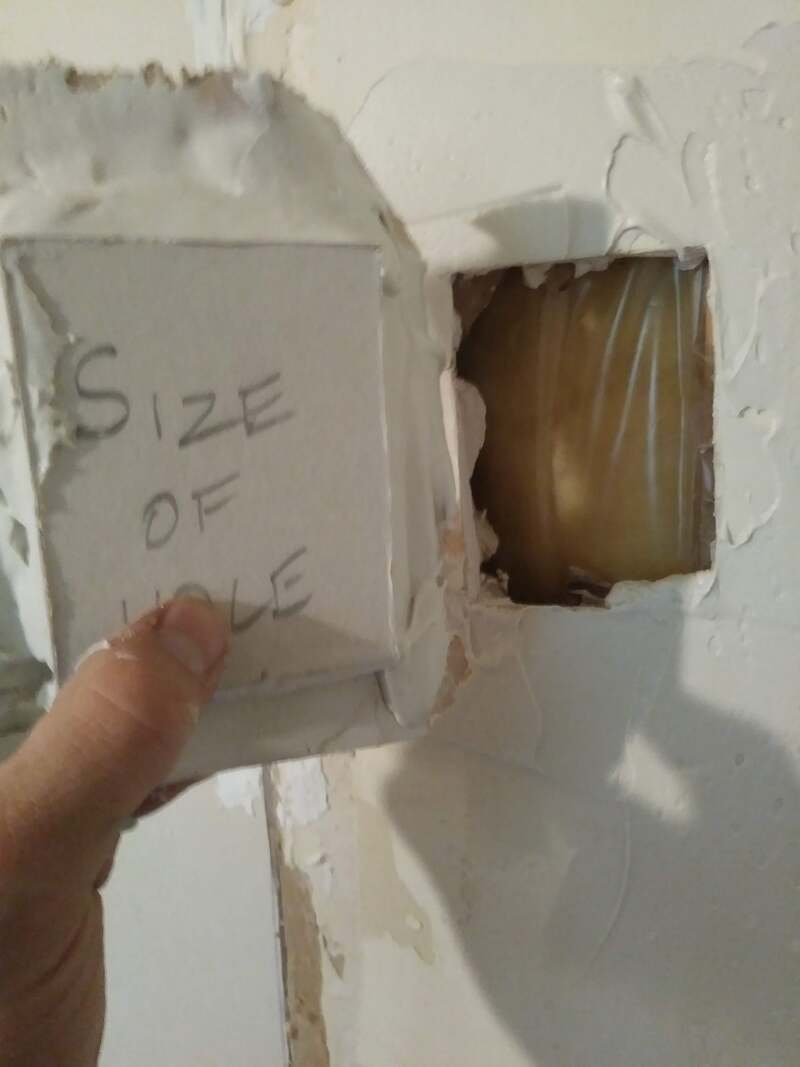
Cut out your hole to a rectangular shape, using either a drywall saw or a utility knife. Carefully clean the edges of the hole, making sure there is no paper left sticking up, and that there is good solid drywall around the whole perimeter of the hole. Then measure and transfer the hole size onto a piece of drywall, being sure to leave at least an inch of space around the outline of the hole. See the picture to the right of this paragraph. Once you have the hole size transferred over, cut out the piece of drywall, leaving a good gap of extra material around the hole. The easiest tool to use for this process is a strong utility knife. If you cut one side of the paper all the way through, you can then break the drywall board and cut the other side with your knife. This makes a clean, easy cut through the material. Once you have the piece sized, cut, and ready to go, you can then proceed to the next step. See the picture to the right to see an example of the patch ready for the next step.
Cut out your hole to a rectangular shape, using either a drywall saw or a utility knife. Carefully clean the edges of the hole, making sure there is no paper left sticking up, and that there is good solid drywall around the whole perimeter of the hole. Then measure and transfer the hole size onto a piece of drywall, being sure to leave at least an inch of space around the outline of the hole. See the picture to the right of this paragraph. Once you have the hole size transferred over, cut out the piece of drywall, leaving a good gap of extra material around the hole. The easiest tool to use for this process is a strong utility knife. If you cut one side of the paper all the way through, you can then break the drywall board and cut the other side with your knife. This makes a clean, easy cut through the material. Once you have the piece sized, cut, and ready to go, you can then proceed to the next step. See the picture to the right to see an example of the patch ready for the next step.
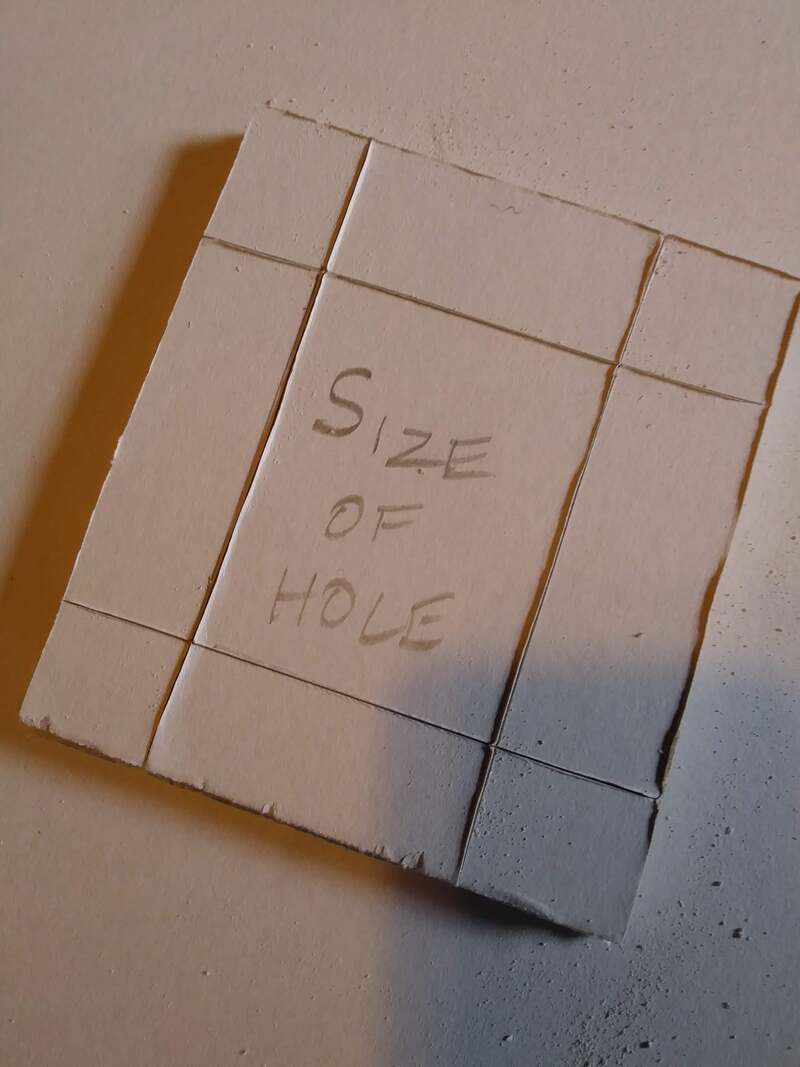
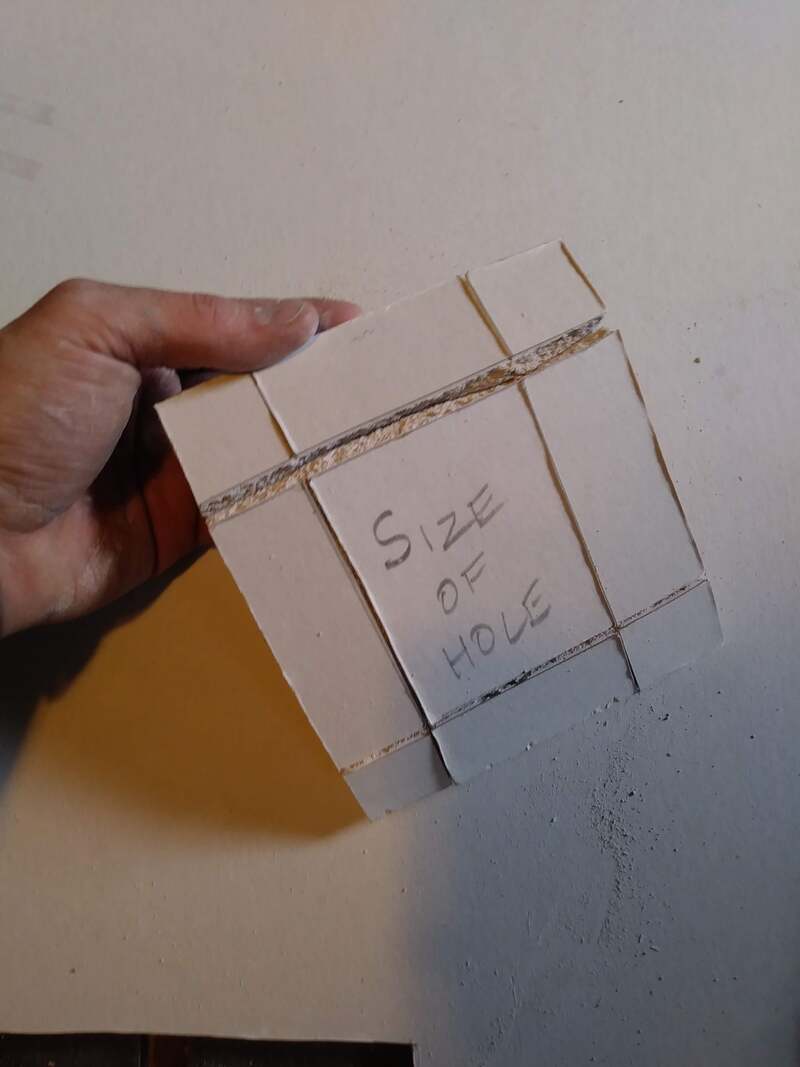
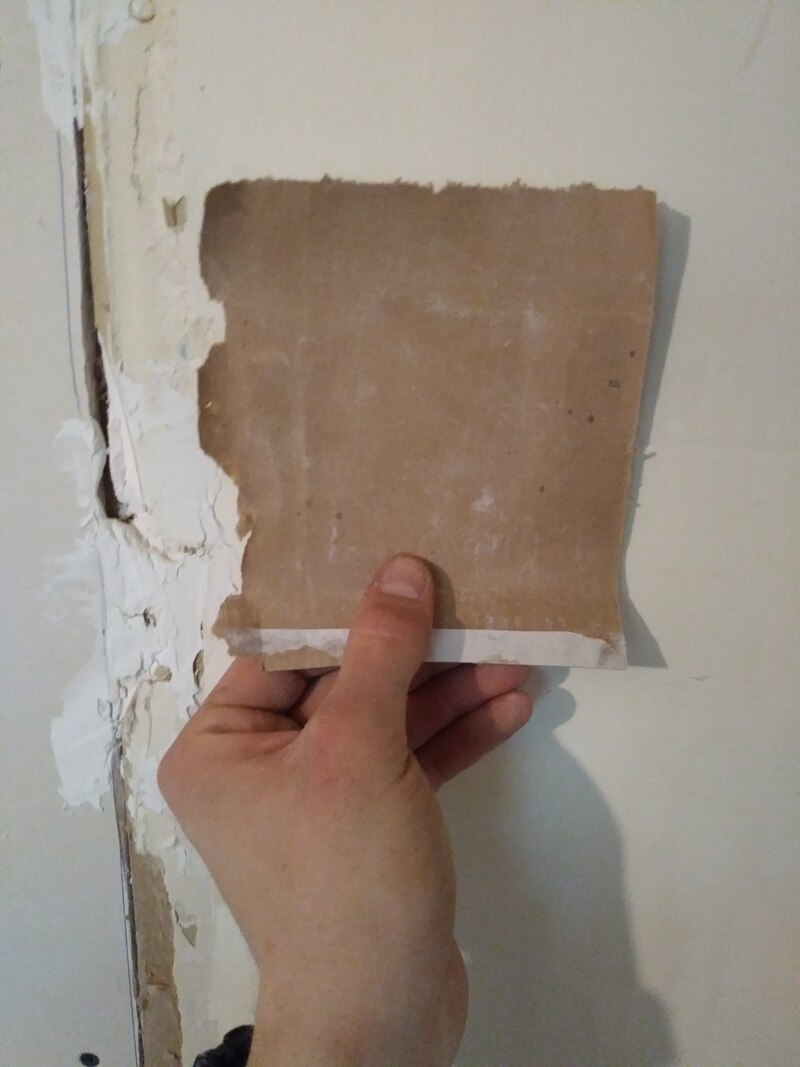
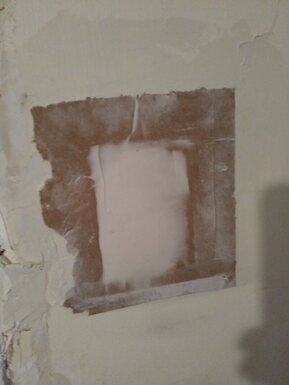
The next step is to get the edges of the patch ready for the installation. To do this, make score lines like you see in the first picture. A utility knife is the best tool for this job. Once the paper is cut, you can carefully break the gypsum board so that it is only one side of the paper holding the flap on. Then carefully peel the drywall and the cut piece of paper off that flap, leaving a perimeter of paper all around the patch you are going to use for filling your hole. The paper edges will give strength to your patch, and enable you to get a good, seamless joint all around the hole to make your interior painting easier.

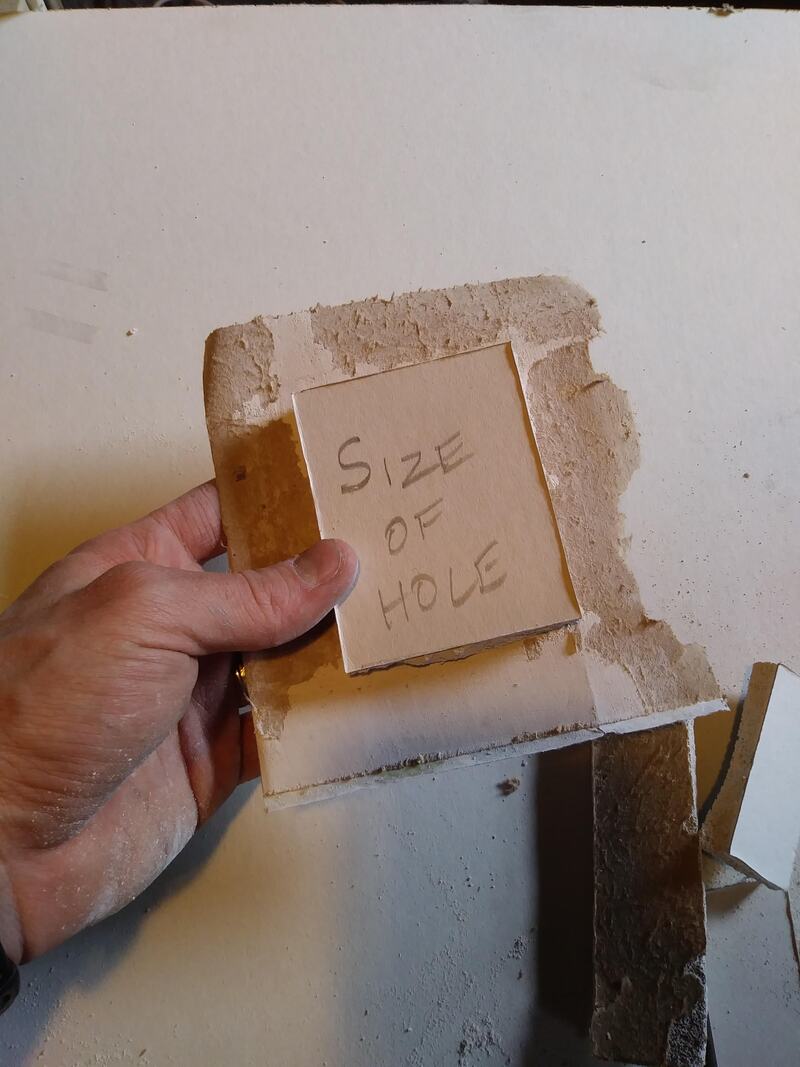
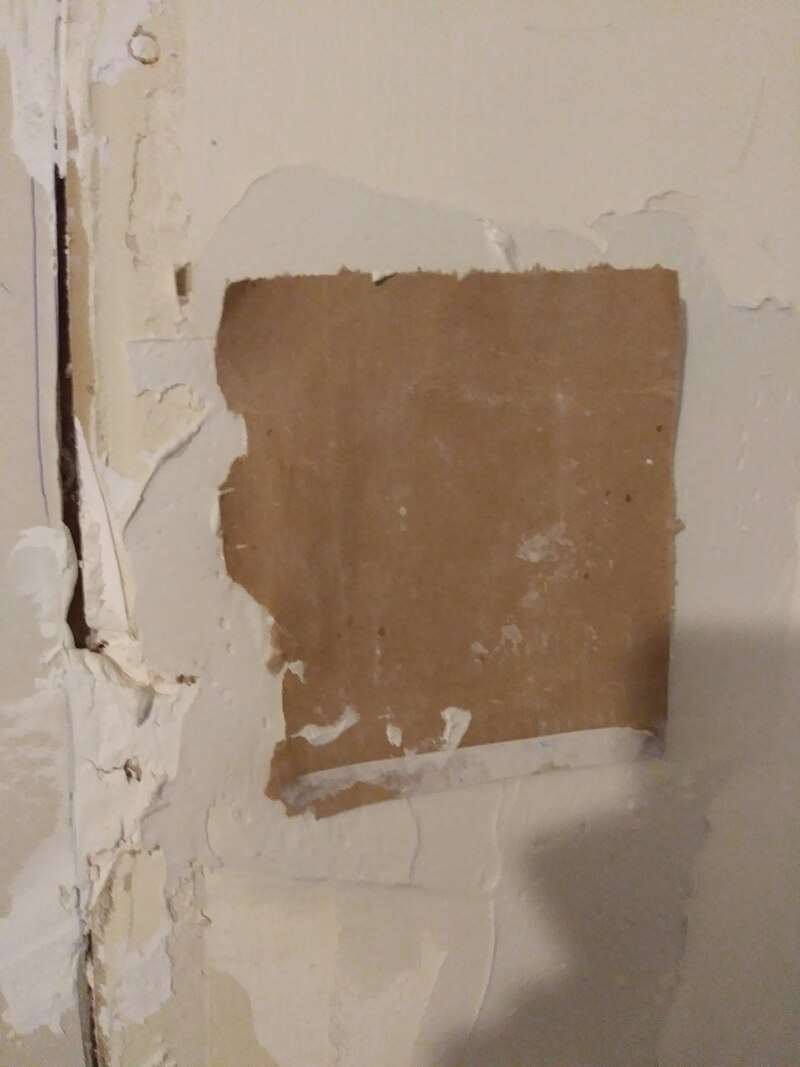
The next step is to check the fit of the patch in the hole. Make sure you do a dry fit of your patch before going any further. This is important, because you won't have a good chance to modify the fit later on when you are actually applying it to the wall. Once your dry fit is complete, and you have trimmed any edges that might be a little tight, you can move on to applying the drywall compound. Any drywall contractor will tell you that the easiest way to do drywall, is to make sure the mud has completely dried between each step.
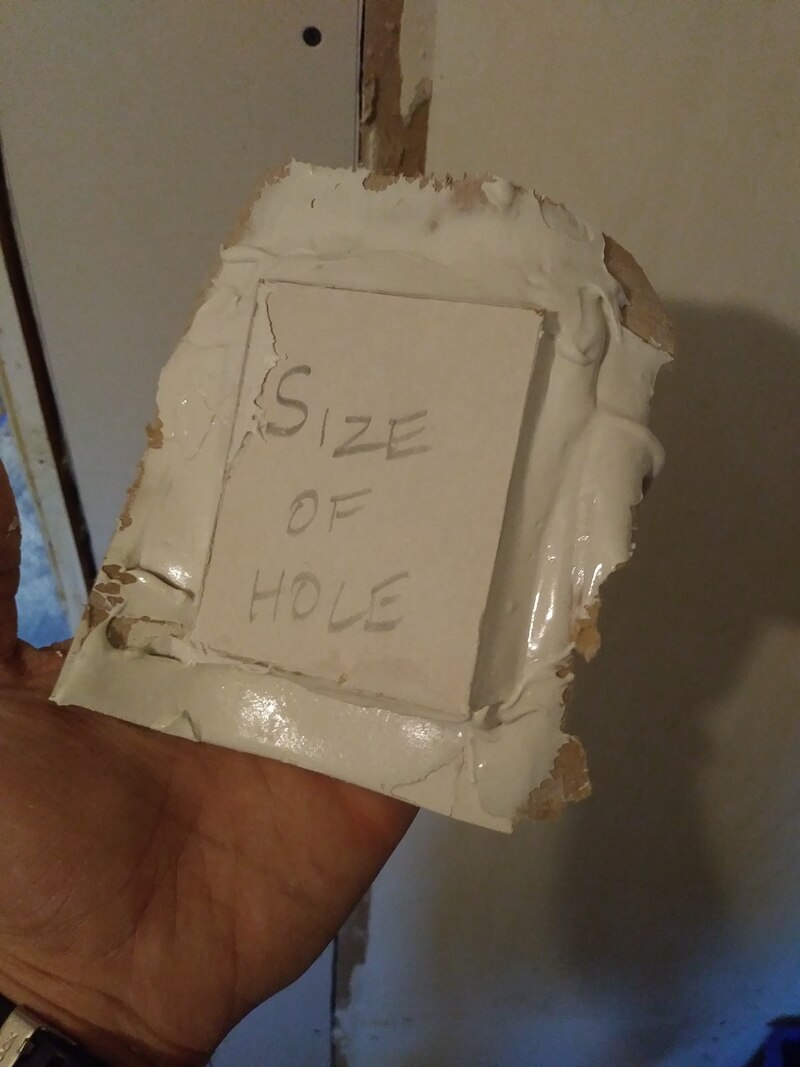
Apply the mud, or drywall compound liberally to all edges of the patch and on the paper. See the above images for clarification. Don't be scared to put on too much. You will be using a drywall knife to flatten the paper edges and squeeze out any excess, so don't worry. The worst thing that could happen is that you end up not having enough mud in one area, and then you have to take the patch off and start over. So slather that mud on there. Once the mud is applied, you can press the patch into the hole. As you can see in the last picture, then use your drywall knife to press the mud out from under the edges of the paper. Don't worry about putting any compound over the patch at this point. Just press the mud out, flatten the paper as much as you can, and then let the whole thing dry for a day or so. When the paper is in contact with the mud, it tends to get wrinkly and wet, so it is important to just touch is as much as you really need to, then leave it. Once this first step is dry, you can then go back and put a few thin layers of compound over the patch, getting it ready for sanding and painting.
We hope you have found this tutorial helpful. If you have any questions on how this works, or need help with painting in Fredericton once the drywall is done, give Fredericton Painting Pros a call and we can help you with all your interior painting needs.
We hope you have found this tutorial helpful. If you have any questions on how this works, or need help with painting in Fredericton once the drywall is done, give Fredericton Painting Pros a call and we can help you with all your interior painting needs.